Table of Contents
- Why a Level Refrigerator Matters
- How to Level a Refrigerator Safely
- Check the refrigerator’s current position
- Find the leveling feet or adjustment screws
- Make small adjustments, one side at a time
- Confirm that the refrigerator is stable
- Common Mistakes to Avoid
- When Leveling Will Not Solve the Problem
A refrigerator that rocks when you open the door can turn a simple grocery run into a frustrating problem. Doors may swing shut too quickly, fail to seal completely, or sit slightly open without anyone noticing. If you have searched for “how to level refrigerator,” the good news is that this is often a manageable homeowner task – and getting it right can help protect the food your family depends on.
Leveling is not only about making the appliance look straight. It affects how the doors close, how stable the refrigerator feels, and in some cases, how well the unit performs over time. The goal is to follow your refrigerator manufacturer’s leveling guidance while making small, deliberate adjustments.
Why a Level Refrigerator Matters
Most refrigerators are designed to sit level from side to side, with a very slight rise toward the front or rear depending on the model. That small angle helps the doors close correctly and keeps the cabinet stable. Many models are intended to lean back slightly so gravity helps the doors swing closed from a partially open position.
When a refrigerator is out of level, you may notice a door that drifts open, a drawer that does not slide smoothly, excessive vibration, or a cabinet that moves when you pull on the handle. A poor door seal is the biggest concern. Warm kitchen air can enter through a small gap, making the refrigerator work harder and putting stored food at risk.
An uneven floor does not always mean the refrigerator is installed incorrectly. Homes settle, flooring transitions create small height changes, and tile or grout can leave an appliance sitting unevenly. The important thing is to stabilize the refrigerator using its adjustable leveling system rather than forcing it into place with shims or household objects.
How to Level a Refrigerator Safely
Before adjusting anything, remove loose magnets or items from the top of the refrigerator. You do not usually need to empty the entire unit, but avoid leaning heavily on the doors or trying to move a fully loaded refrigerator by yourself. If the appliance needs to be pulled far from the wall, protect the floor and ask for help.
Start by checking the owner’s manual if you have it. Leveling systems vary by brand and model. Some refrigerators have adjustable feet behind the lower grille, while others use leveling legs, rollers, or screws accessible from the front. A few models require a specific wrench or socket.
Check the refrigerator’s current position
Place a carpenter’s level on top of the refrigerator cabinet, not on a door or a removable shelf. Check from left to right first, then from front to back. If you do not have a level, a smartphone level app can offer a rough reading, but a basic bubble level is more dependable for this job.
Also pay attention to the doors. Close them gently, then open each one about halfway and release it. On many refrigerators, both doors should ease themselves shut. If one door falls open or stays where it is, the cabinet may need adjustment. Do not rely on the doors alone, since door hinge tension and worn parts can create similar symptoms.
Find the leveling feet or adjustment screws
Most standard refrigerators have a lower front grille or kick plate that can be removed by pulling gently or releasing clips. With the grille off, look near the bottom corners for adjustable legs or screws. Some units have roller adjustment screws that raise or lower the front of the appliance.
Do not confuse leveling parts with water lines, electrical connections, or compressor components. If the adjustment points are not obvious, stop and review the model-specific instructions. Turning the wrong part can damage the appliance or create a service issue.
Make small adjustments, one side at a time
Use the recommended wrench, socket, or flat-head screwdriver to turn the adjustment point in small increments. On many models, turning clockwise raises that side and turning counterclockwise lowers it, but this is not universal. Check the manual rather than assuming.
Adjust one front corner, then recheck the level. A quarter-turn can make more difference than expected, especially on a hard tile floor. Continue with small changes until the refrigerator is level side to side and positioned according to the manufacturer’s front-to-back recommendation.
For many refrigerators, the front should sit just slightly higher than the back. This encourages door closure and can prevent the doors from drifting open. Too much tilt, however, can make drawers operate poorly or put unnecessary stress on the cabinet. Slight is the key word.
Confirm that the refrigerator is stable
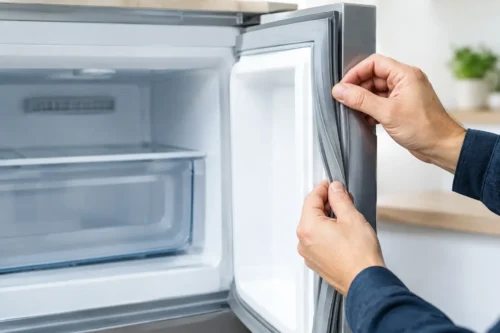
Once the level reading looks right, gently press on the upper corners of the refrigerator. It should not rock or shift. Open and close each door several times, then check that the gaskets contact the cabinet evenly all the way around.
If the unit was moved during the process, make sure there is adequate clearance around it for ventilation. Avoid pushing it tightly against the wall, crushing the water line, or pinching the power cord. Replace the lower grille when you are finished.
Common Mistakes to Avoid
The most common mistake is trying to level a refrigerator by placing cardboard, wood scraps, or random shims underneath it. Those materials can compress, slip, collect moisture, or create an unstable appliance. Use the factory-installed leveling feet whenever possible.
Another mistake is adjusting the refrigerator while it is pressed against cabinets or wedged into a tight opening. The cabinet may appear level because surrounding surfaces are holding it in place. Pull it forward carefully enough to let it settle naturally before checking again.
Avoid overcorrecting based on a single measurement. Floors are rarely perfectly flat, and refrigerator cabinets are not always the best visual reference in a kitchen with uneven countertops or tile lines. Stability, proper door operation, and the manufacturer’s specified tilt matter more than making the appliance look perfectly square with the room.
Finally, do not keep forcing an adjustment screw that will not turn. Rust, stripped threads, a damaged roller, or a bent leveling leg can make a simple job much harder. Excessive force can turn a minor issue into a broken component.
When Leveling Will Not Solve the Problem
A refrigerator can be level and still have doors that will not close or seal. Worn hinges, damaged door cams, torn gaskets, overloaded door bins, warped shelves, and misaligned drawers can all interfere with closure. If the refrigerator is cooling poorly, making unusual noises, or showing frost buildup, leveling may only be part of the answer.
Pay close attention if food is warming, condensation is forming around the door frame, or the compressor seems to run almost constantly. Those signs deserve prompt attention because they can lead to food spoilage and higher energy use. A door that appears only slightly out of position can still create a meaningful air leak.
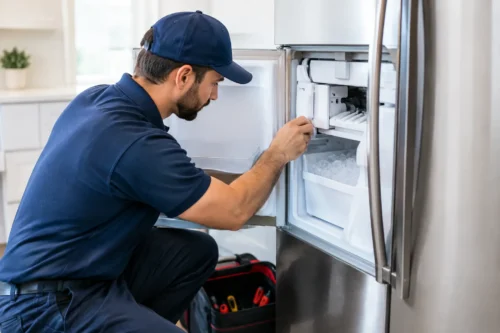
In St. George and across Southern Utah, Master Tech Appliance Repair can diagnose whether the issue is a simple adjustment or a mechanical problem that needs repair. An experienced technician can inspect door alignment, hinges, leveling hardware, seals, and cooling performance without guesswork.
A refrigerator should feel solid, close reliably, and let you get on with your day without wondering whether the door sealed after someone grabbed a snack. If careful leveling does not restore that confidence, it is worth having the appliance checked before a small inconvenience becomes a lost load of groceries.