Table of Contents
- Why a freezer door seal matters
- Freezer door seal guide: signs of an air leak
- Try the dollar-bill test
- Start with a careful cleaning
- Check the door before replacing the gasket
- When a freezer door seal should be replaced
- Protect your food while you troubleshoot
- When to call for professional freezer repair
A freezer door that does not seal properly can turn a small rubber gasket problem into freezer burn, rising utility bills, and a pile of food you no longer trust. This freezer door seal guide explains how to recognize a weak seal, what you can safely check yourself, and when a repair is the sensible next step.
Why a freezer door seal matters
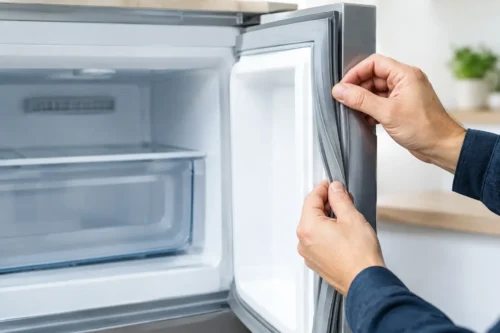
The flexible strip around your freezer door is called a gasket or door seal. It creates an airtight barrier between the cold compartment and the warm kitchen air outside. When that barrier is intact, the freezer can maintain its set temperature without running longer than necessary.
When the gasket is dirty, warped, torn, or pulled away from the door, humid air enters every time the compressor cycles. That moisture can create frost along the door frame, on food packages, or inside the freezer. The appliance may run more often, and frozen food can slowly lose quality even if it never fully thaws.
In Southern Utah, warm indoor conditions and busy family kitchens can make a marginal seal more noticeable. A door that is opened often or does not close squarely has to work against a bigger temperature difference. The good news is that many seal issues can be identified early, before they lead to food loss or strain on the refrigeration system.
Freezer door seal guide: signs of an air leak
A little frost in a manual-defrost freezer is not always a reason for concern. But frost concentrated near the door opening is often a clue that warm, moist air is getting in. Look closely at the gasket and the surface it contacts rather than assuming the freezer itself has failed.
Common signs include excessive frost around the door edge, ice crystals on food near the front, a freezer door that pops open or needs a push to stay closed, and a compressor that seems to run much more than usual. You may also notice the gasket feels loose in one corner, has cracks, or looks flattened where it should spring back against the cabinet.
Pay attention to temperature changes, too. Ice cream that becomes soft, meats with heavy freezer burn, or an ice maker that begins producing smaller or misshapen cubes can point to a temperature issue. A poor seal is one possible cause, although a faulty fan, defrost problem, control issue, or refrigeration-system concern can create similar symptoms.
Try the dollar-bill test
A simple test can help you locate a weak spot. Close the freezer door on a dollar bill or a sheet of paper, then pull it straight out. It should have noticeable resistance. Repeat around the top, sides, and bottom of the door.
If the paper slides out easily in one area, inspect that section for crumbs, sticky residue, a twisted gasket, or a door alignment problem. This test is useful for finding a concern, but it is not a complete diagnosis. A door may pass in one position and still leak when it is loaded, sagging, or not closing evenly.
Start with a careful cleaning
Food residue, dust, and dried spills can prevent the gasket from sitting flat. Cleaning is the first practical step, and it costs very little.
Unplugging the appliance is not usually necessary for a quick gasket cleaning, but avoid soaking electrical areas and work with the door open only as long as needed. Use warm water with a small amount of mild dish soap and a soft cloth. Wipe the gasket folds, especially the inner grooves where debris collects, then clean the smooth cabinet surface the gasket touches.
Dry both surfaces thoroughly before closing the door. Leaving moisture on the gasket can encourage frost and make it harder to judge whether the seal has improved. Do not use abrasive pads, bleach, harsh solvents, or sharp tools. They can damage the rubber and turn a cleaning project into a replacement job.
If the gasket is slightly misshapen but not torn, gentle warming may help it regain its form. A hair dryer on low, held at a safe distance and moved continuously, can soften a stubborn section. Do not overheat the rubber or use an open flame. Once the gasket is warm, close the door and let it rest in its correct position.
Check the door before replacing the gasket
A new seal will not solve a door that is out of alignment. This is where homeowners can save themselves an unnecessary part purchase.
First, check whether bins, frozen-food packages, or an ice buildup are blocking the door. Overfilled freezers are a common cause of a door that appears defective but simply cannot close all the way. Make sure drawer rails, shelves, and baskets are fully seated.
Next, look at the door itself from the side. Does it sit lower on the handle side? Does it rub against the cabinet or seem to drop when opened? Loose, worn, or damaged hinges can prevent the gasket from meeting the cabinet evenly. Some refrigerators also have closing cams or hinge components that guide the door shut. When those parts wear out, the door may not pull itself closed as it should.
Avoid forcing a sagging door upward or tightening hardware without understanding the hinge design. Modern refrigerator and freezer doors can be heavy, and incorrect adjustment can damage hinges, wiring, water lines, or the cabinet finish. If the door is visibly uneven, a service diagnosis is often safer and more effective than replacing the gasket first.
When a freezer door seal should be replaced
Cleaning can restore performance when the gasket is simply dirty. Replacement is more likely needed when the rubber is split, brittle, permanently flattened, badly warped, or pulling away from its mounting channel. A gasket with mold that cannot be fully cleaned may also be worth replacing, particularly if it affects food-storage sanitation.
The right replacement gasket depends on the appliance model, not just the brand or approximate door size. Similar-looking seals can have different corner shapes, mounting styles, magnet placement, and dimensions. Ordering by model number is essential.
Replacement can be a reasonable do-it-yourself job for an accessible gasket on a standard unit, especially if the installation method is straightforward. Still, there are trade-offs. Some gaskets install behind an inner door panel, and overtightening screws can distort the liner. Others need careful shaping before they seal correctly. If the cabinet surface is bent, the door has sagged, or frost returns after a new gasket is installed, the problem was likely more than the seal.
Protect your food while you troubleshoot
Keep the door closed as much as possible while you inspect the issue. A full freezer holds its temperature longer than a nearly empty one, so grouping food together can help during a short repair or cleaning task. If you see melting, widespread soft food, or a temperature above 0°F for an extended period, move high-value or perishable items to another freezer if possible.
Do not scrape ice aggressively from the door frame with a knife or screwdriver. It is easy to puncture a liner, cut the gasket, or damage hidden components. If ice is preventing the door from closing, use the manufacturer-approved defrost process or arrange for service if the buildup is significant.
It also helps to check the freezer temperature with an appliance thermometer after any adjustment. Give the unit time to stabilize before judging results. A properly closing door may not bring temperatures back immediately if the freezer has been working hard or has a separate airflow or defrost issue.
When to call for professional freezer repair
Call for help when the gasket looks fine but frost, warm temperatures, or long run times continue. Professional diagnosis is also a smart choice if the door is sagging, the hinge is damaged, the seal will not stay in place, or the unit has a recurring ice buildup problem.
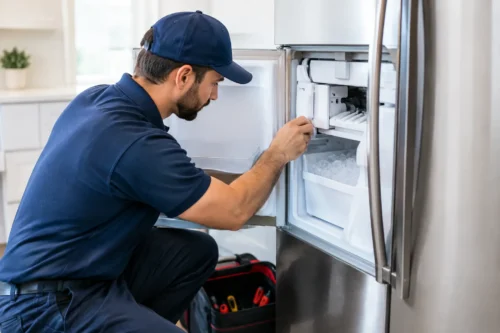
A trained technician can determine whether the problem is the gasket, door alignment, defrost system, fan motor, control, or another component. That distinction matters. Replacing a door seal can be worthwhile, but only when it addresses the actual source of the air leak or temperature problem.
For homeowners in St. George and nearby Southern Utah communities, Master Tech Appliance Repair can inspect freezer door concerns with the practical goal of protecting your food and restoring dependable daily use. A properly sealed freezer should close confidently, hold its temperature, and let you stop wondering whether the groceries in the back are still safe.